Metered Internet Connection in Windows 10
Introduction:
Windows 10 provides a nice option for metered networks, metered networks are networks where you had limited bandwidth or limited quota of download.
Turning the metered network option enables you to stop the download of windows updates and software updates and get your usage for the data package wiser and rationalized.
![]()
How to Set a Wi-Fi Connection as Metered:
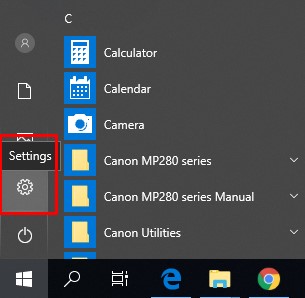
1- Open the start menu and select Settings.
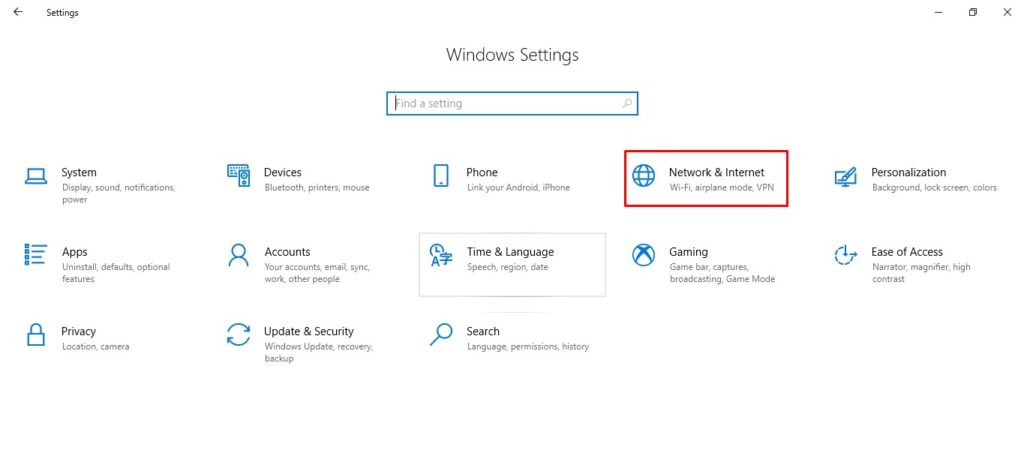
2- Click the Network and Internet button.
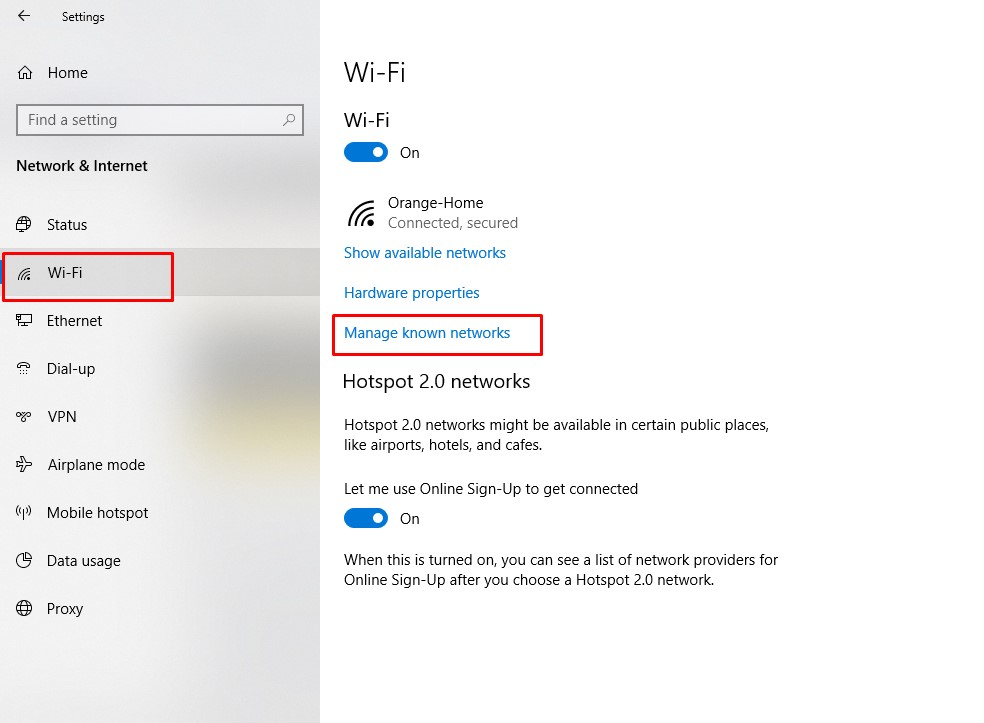
3- Select Wi-Fi from the left side.
4- Click the Manage known network link under your existing connection.
5- Choose the network you’re currently using from the list of available ones.
6- Click Properties.

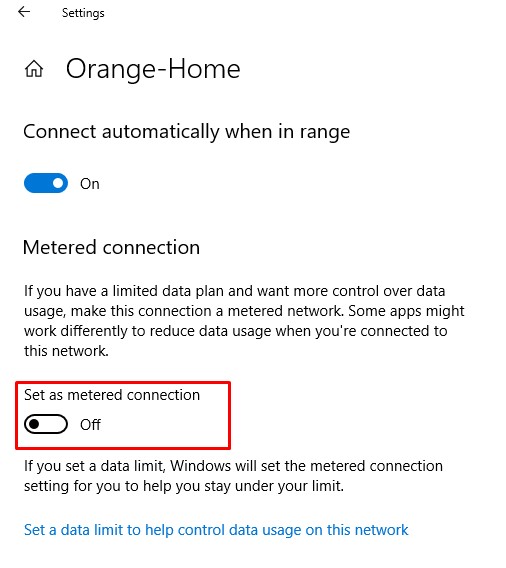
7- Find the Metered connection section and toggle the switch to On.
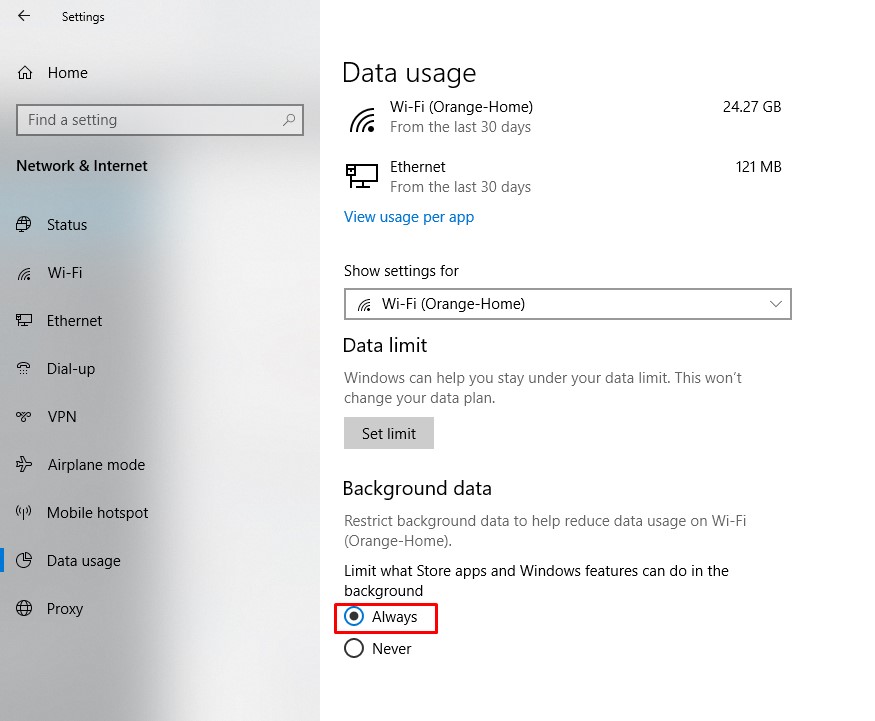
8- Click on “Set data limit to help control data usage on this network”

9- Click on “set limit “

10- Set the data limit and then save.

11- You can also restrict background data by choosing always.
The same steps can be done if you are using an Ethernet connection instead of WIFI.
we are always glad to help and support you,
whether you are a business user or a home user we are always ready to provide support.
you can leave your comment here or contact us on email: info@andi-tech.com
also, you can have a look at our services at https://andi-tech.com
thanks for your valuable time visiting our site.