Install Shared Network Printer
Introduction
As stated before there are three ways to connect the printer to the network, in this post we will illustrate one of them when we need to share a printer directly connected to a PC.
Share a Printer Connected to a PC
you can always use the sharing tools that have always been a part of Windows to share a printer with the network. Make sure the printer is connected to a PC and that you can print to it.
- Open Control Panel > select Devices and Printers.
 2. Right-click the printer you want to share with the network and then select “Printer properties”.
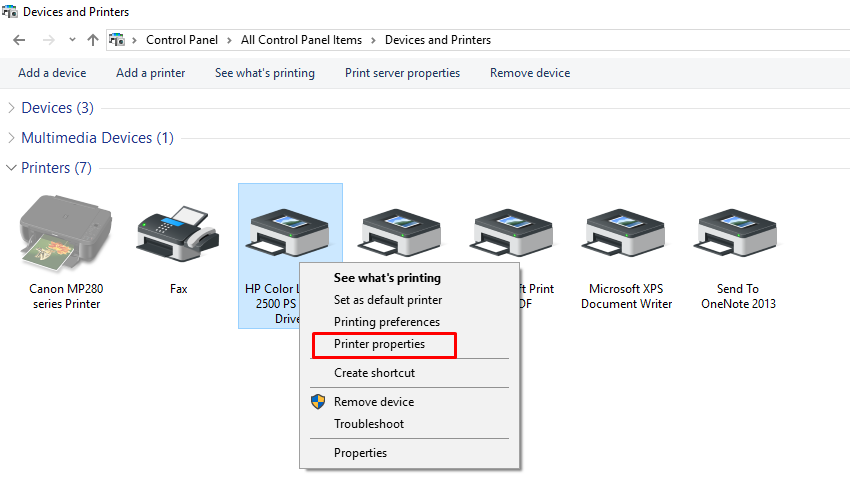 3. The “Printer Properties” shows all settings you can configure on the printer. For now, click the “Sharing” tab.
 4. Enable the “Share this printer” option and, if you want, give the printer a friendly name so that others on the network can more easily identify the printer and then press apply.
5. Now you can search for this shared printer from other computers.
6. On the computer you want to install the printer, open Control Panel–>Devices and Printers–>Add a Printer
a new window will open searching for shared printers on the network, you should find the printer you just shared, choose it and the wizard will guide you installing it.
It is always our pleasure to help and support you,
whether you are a business user or a home user we are always ready to provide support.
you can leave your comment here or contact us on email: info@andi-tech.com
also, you can have a look on our services at https://andi-tech.com
thanks for your valuable time visiting our site.
I would like to say fantastic blog